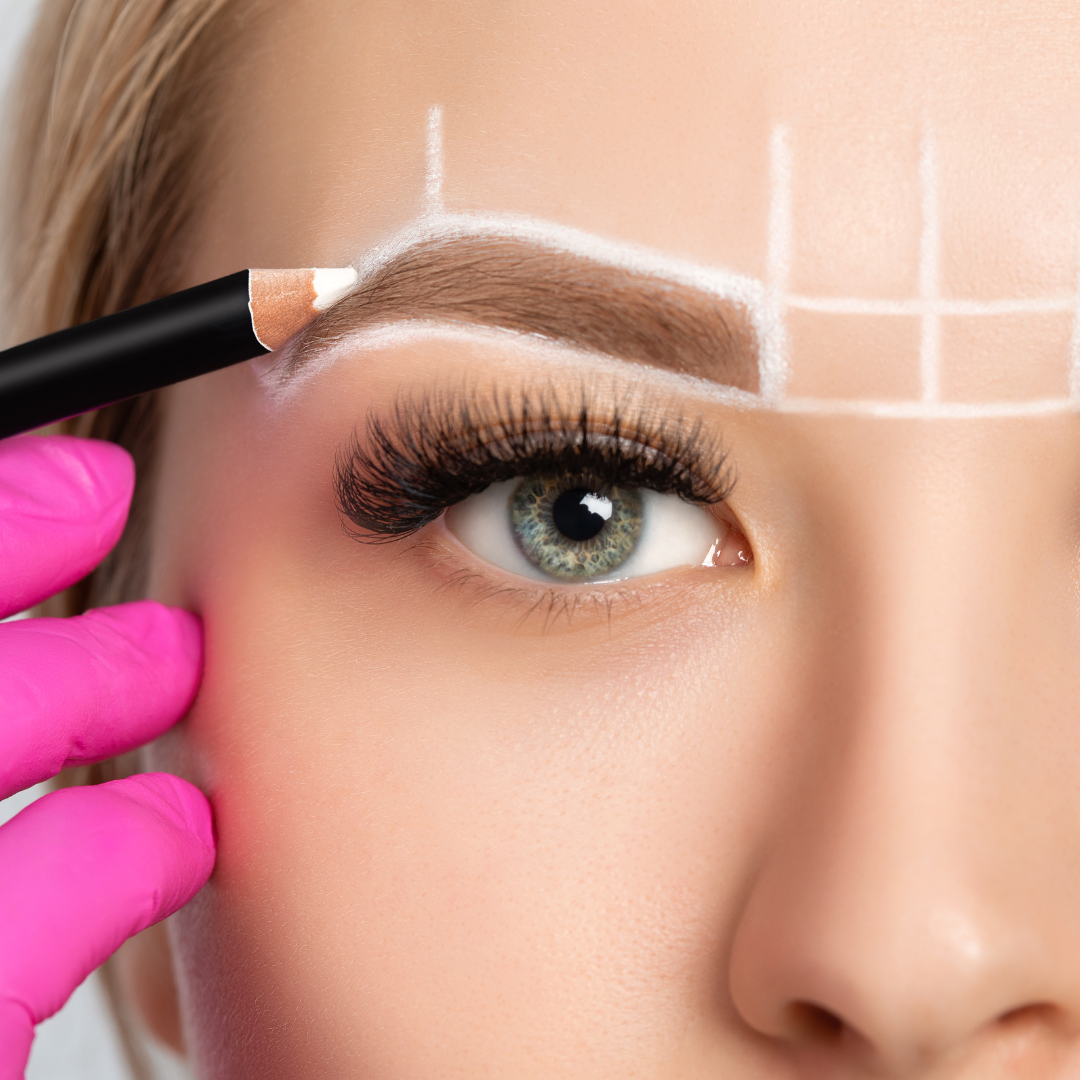
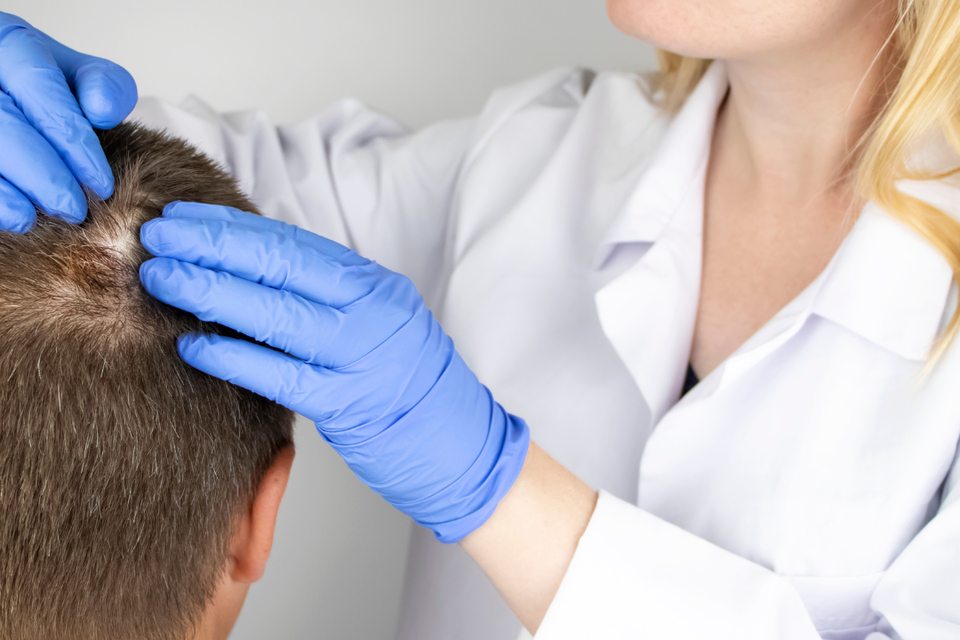
Soothing the Itch: 5 Effective Remedies for Itchy Brows After Microblading
Microblading has rapidly gained popularity as an excellent technique to achieve fuller, perfectly shaped brows. The semi-permanent makeup process involves implanting tiny pigment-filled strokes into the skin under the brows, mimicking natural hairs. However, as with any procedure that disrupts the skin, microblading can cause discomfort and itchiness during the healing phase. This can be particularly challenging, considering the critical rule of microblading aftercare: Don't scratch your brows!
If you're feeling the itch after a microblading session, fret not. There are numerous effective remedies to help soothe your skin without damaging the fresh, beautiful brows you've just received. Here are five recommended remedies for itchy brows post-microblading:
**1. Use A Cold Compress**
The cold can help reduce inflammation and itching. You can use a clean, cold compress on your brows, but ensure you don't press too hard or rub, as this can displace the pigment or damage the healing skin. It's best to use a soft cloth or a chilled gel mask, gently holding it onto the itchy area for a few minutes.
**2. Apply Post-Care Healing Ointment**
Aftercare ointments specially designed for post-microblading care are highly effective in easing the itch. These ointments are usually infused with ingredients like panthenol, which helps moisturize the skin and promote healing. Apply a thin layer of the ointment to your brows a few times a day, being careful not to saturate the area.
**3. Resist Touching Your Brows**
The urge to scratch your itchy brows can be overwhelming, but giving in could lead to infection or poor pigment retention. Keeping your hands off your face can be a powerful remedy in itself. Instead of scratching, distract yourself. Engage in activities that require your hands, like knitting or cooking, to keep them busy.
**4. Keep the Area Clean**
Bacteria can cause inflammation and increase itchiness, so it's essential to keep your microbladed brows clean. Use a mild, fragrance-free soap or an antimicrobial wash as per the instructions of your microblading artist. Avoid scrubbing the area; instead, use a gentle dabbing motion. Remember to always pat your brows dry; don't rub them.
**5. Stay Hydrated**
Hydration plays a crucial role in the healing process. Drink plenty of water to keep your skin hydrated from the inside. Additionally, a gentle, alcohol-free, fragrance-free moisturizer can help maintain surface hydration. This prevents the scabs from drying out and becoming itchy.
Always remember that while these remedies can soothe your itchy brows, the itching is actually a good sign. It indicates that your skin is healing, which means your perfect brows are just a few days away. However, if you notice redness, pain, or discharge, it could be a sign of infection, and you should seek immediate medical attention.
Microblading is a journey that requires patience and care. By adopting these simple yet effective remedies, you can alleviate post-procedure itchiness and ensure your journey to stunning brows is as comfortable as possible.
Disclaimer: This blog post should not replace professional medical advice. If you're experiencing severe or persistent itching after microblading, consult a healthcare professional or your microblading artist.
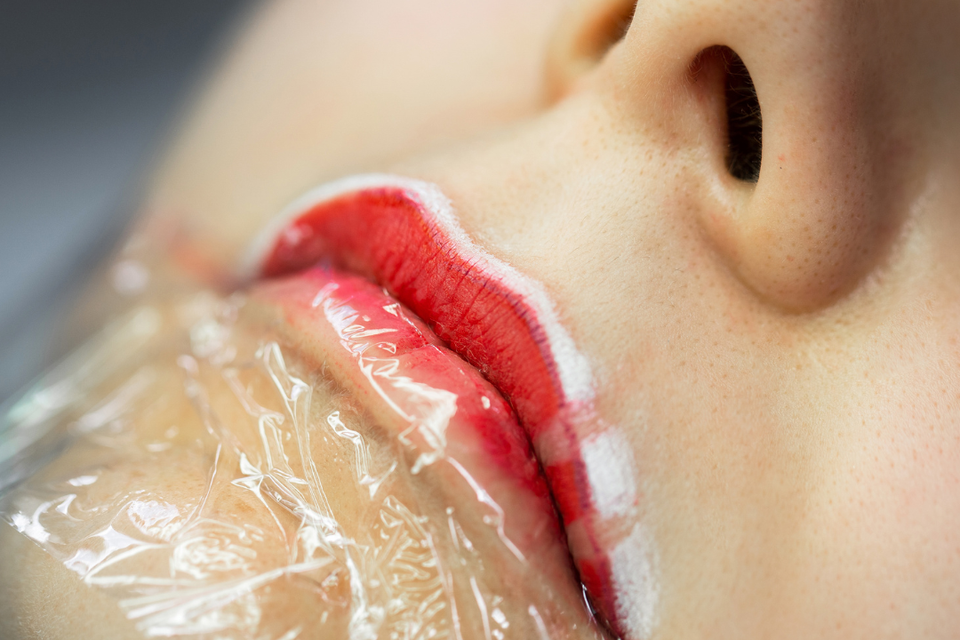
Painting the Perfect Pout: How to Pick a Lip Blushing Artist
Title: Painting the Perfect Pout: How to Pick a Lip Blushing Artist
Lip blushing is a semi-permanent cosmetic treatment that enhances the natural color and shape of your lips. The procedure involves depositing organic pigments into the skin to define the lips, correct asymmetry, and add a youthful blush of color. As it grows in popularity, choosing the right lip blushing artist becomes all the more critical to ensure beautiful, lasting results. Here are some key factors to consider when selecting your lip blushing artist.
**1. Experience and Specialization**
Like any other artistic profession, experience matters greatly in the field of cosmetic tattooing. An experienced lip blushing artist will have honed their technique, developed a keen eye for color and symmetry, and be familiar with how different skin types react to pigment.
In addition to general experience, look for an artist who specializes in lip blushing. Each area of cosmetic tattooing requires a specific set of skills, so an artist who focuses on lip blushing will be well-versed in the unique techniques this procedure requires.
**2. Portfolio and Style**
Reviewing an artist’s portfolio is one of the best ways to gauge their talent and the results you can expect. Look for clear before and after photos that showcase the artist's ability to create natural-looking, well-defined lips. Pay special attention to the artist’s color choices and their ability to match the blush color to each client's skin tone and personal style.
The artist’s style should also align with your aesthetic preferences. If you prefer a subtle, natural look but the artist's portfolio mainly consists of bold, dramatic lip blushing, they may not be the best fit for you.
**3. Client Testimonials**
Take the time to read reviews and testimonials from previous clients. These can provide valuable insights into the artist's professionalism, cleanliness, attention to detail, and overall client satisfaction. Be wary of artists who have numerous negative reviews or no reviews at all.
**4. Certifications and Training**
Ensure your lip blushing artist is certified and has received appropriate training in cosmetic tattooing. Certification demonstrates that the artist adheres to safety standards and best practices. You may also want to ask about their training in color theory, which is essential for selecting the right pigments.
**5. Consultation Process**
A thorough consultation process is a good sign that an artist takes their clients’ needs and concerns seriously. The artist should take the time to understand your expectations, explain the procedure in detail, discuss color choices, and answer any questions you may have. They should also assess your skin type, review your medical history, and discuss pre and post-procedure care.
Choosing the right lip blushing artist is a significant part of ensuring you are thrilled with your results. By considering these five factors – experience, portfolio, testimonials, certifications, and consultation process – you can find an artist who will bring your vision of beautiful, blushed lips to life.
Remember: lip blushing is a form of cosmetic tattooing, which means it should be done by a trained professional in a clean, safe environment. Always prioritize safety and professionalism above all else.
Disclaimer: This blog post should not replace professional medical advice. Always consult with a healthcare professional before undergoing any cosmetic procedures.
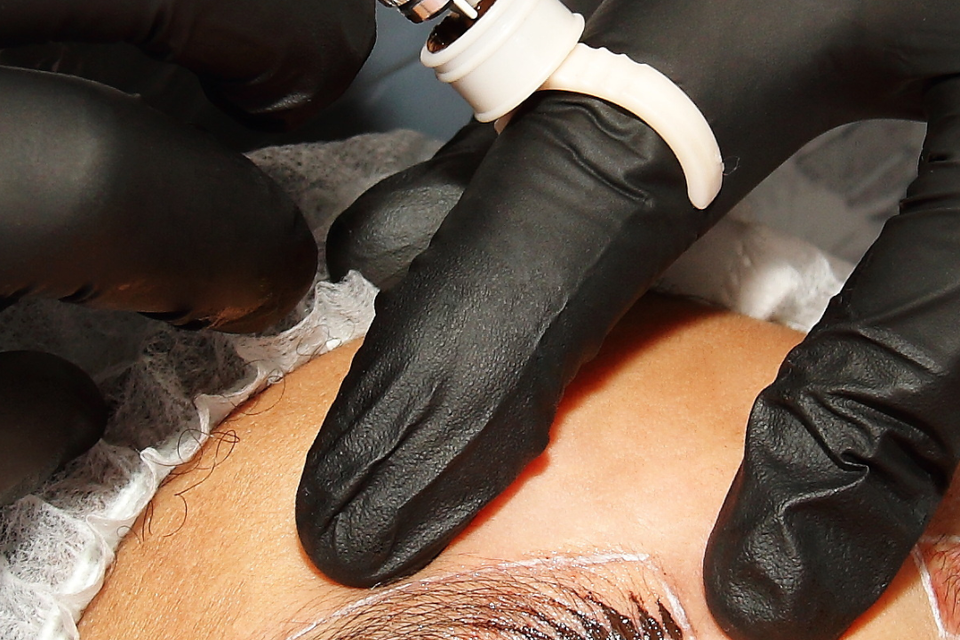
Sculpting Perfect Brows: How to Choose the Right Color for Your Eyebrow Tattoo
Eyebrow tattoos, a type of semi-permanent makeup, are a game-changer in the world of beauty, delivering the dream of flawless, effortless brows 24/7. Achieving natural-looking, beautiful eyebrow tattoos relies heavily on the correct color choice. The ideal shade should merge flawlessly with your existing brow color and accentuate your skin tone. This guide will help you navigate through the process of choosing the right color for your eyebrow tattoo.
**1. Reflect on Your Natural Hair Color**
Your natural hair color is a crucial consideration in determining your eyebrow tattoo color. Generally, your eyebrows should be about one or two shades close to your hair color to attain the most natural appearance. For example, if you're a brunette, a dark brown color could work best, whereas lighter taupe or dark blonde shades often suit blondes. For individuals with red or auburn hair, you might need to explore brow colors with a touch of red or warm undertones.
**2. Evaluate Your Skin Tone**
Your skin tone also plays a role in your eyebrow color selection. For fair skin, a soft, light brown can offer a natural, yet defined look. Those with medium skin tones can lean towards a true brown shade, while individuals with dark skin tones can opt for a dark brown to black color. Remember, it's always better to select a slightly lighter shade than to go too dark, which can lead to an overly stark contrast.
**3. Engage a Professional for Consultation**
A professional consultation can be invaluable when it comes to choosing the right color for your eyebrow tattoo. Trained eyebrow tattoo artists understand the intricacies of skin tones and how pigments heal in the skin. They can offer personalized advice based on your hair color, skin tone, and personal preferences.
**4. Contemplate Your Desired Brow Look**
Consider the brow look you want to achieve, as this can influence your color choice. If you favor a bold, statement brow, you might lean towards a darker shade. On the other hand, if you're inclined towards a soft, natural look, a lighter or more muted color could be your best bet.
Choosing the perfect color for your eyebrow tattoo is an integral step towards achieving your ideal brows. It can accentuate your features, bring balance to your face, and shave off valuable time from your morning routine. By considering your hair color and skin tone, seeking professional advice, and envisioning your desired brow look, you're well on your way to finding the perfect shade for your dream brows.
Disclaimer: This blog post should not replace professional advice. Always consult with a professional eyebrow tattoo artist before making any decisions about your procedure.
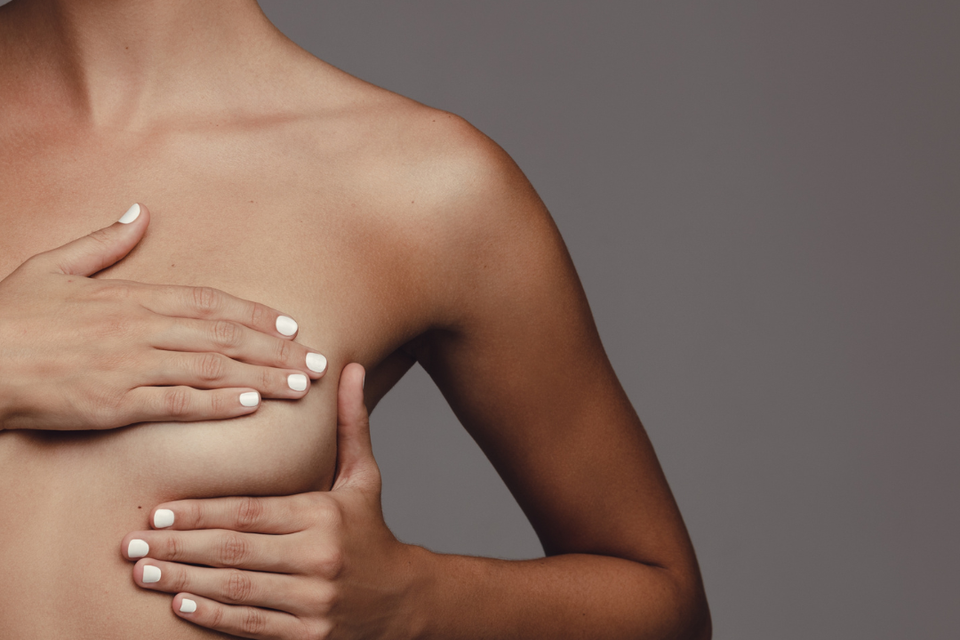
Prepping for Perfection: 3 Essential Steps to Prepare for Your 3D Areola Tattoo
3D areola tattooing, a form of medical tattooing, is a transformative procedure that has brought immense confidence and solace to many individuals, especially breast cancer survivors post-mastectomy. This specialized tattooing process creates the illusion of a three-dimensional, natural-looking areola and nipple. Whether you're undergoing this procedure for restorative or cosmetic reasons, proper preparation is key to achieving the best results.
In this blog post, we will walk you through three essential ways to prepare for your 3D areola tattoo.
**1. Do Thorough Research and Consult with Experts**
In preparation for your 3D areola tattoo, doing thorough research is the first and one of the most crucial steps. Spend time learning about the procedure, potential risks, and what to expect during and after the tattooing process. Look into different artists and their portfolios to find someone who's style you like and who has experience in 3D areola tattooing.
Additionally, consultation with your chosen tattoo artist and your healthcare provider is vital. They can provide personalized advice based on your medical history and skin type. This is also an excellent opportunity to ask any questions or address any concerns you might have.
**2. Maintain Skin Health**
Ensuring your skin is healthy is paramount to the success of your 3D areola tattoo. Hydrated, healthy skin holds pigment better and may heal more quickly post-procedure. In the weeks leading up to your appointment, prioritize skin hydration and care. This includes staying well-hydrated by drinking plenty of water and moisturizing the skin around the breast area with a gentle, fragrance-free moisturizer.
Avoid sun exposure, tanning beds, and harsh skincare products in the weeks leading up to your tattoo appointment. This can help prevent skin damage and ensure your skin is in optimal condition for the procedure.
**3. Prepare for the Day of the Procedure**
On the day of your appointment, ensure you are well-rested and have eaten a good meal. This can help you feel more comfortable and reduce the chance of feeling lightheaded during the procedure. Wear comfortable clothing, ideally with a button-up or zip-up top that does not need to be pulled over your head.
It's normal to feel a bit nervous, but remember that your artist is there to make the process as smooth and comfortable as possible. Arriving prepared can help ease any nerves and set you up for a successful procedure.
Undergoing a 3D areola tattoo can be a significant step, often marking the end of a challenging journey or the beginning of renewed self-confidence. By conducting thorough research, taking care of your skin, and preparing for the day of the procedure, you can go into your tattoo appointment well-prepared and ready to embrace the transformative power of this unique form of tattoo artistry.
Disclaimer: This blog post should not replace professional medical advice. If you're planning to get a 3D areola tattoo, consult with a healthcare professional and a qualified tattoo artist to understand the procedure fully and prepare appropriately.
Unmasking Beauty: What is Scar Camouflaging?
Title: Unmasking Beauty: What is Scar Camouflaging?
Scars can often be reminders of past traumas or experiences that we'd rather forget. However, innovative cosmetic procedures offer a promising solution for those looking to minimize the appearance of these skin imperfections. One such procedure is scar camouflaging. But what exactly is scar camouflaging, and how can it help? In this blog, we'll delve into these questions and more.
**1. Understanding Scar Camouflaging**
Scar camouflaging, also known as scar camouflage tattooing or corrective pigment camouflage (CPC), is a type of medical tattooing. This procedure employs advanced techniques to implant skin-colored pigments into the scarred area. The result is a significant reduction in the visibility of the scar, allowing it to blend seamlessly with the surrounding skin.
**2. Ideal Candidates for Scar Camouflaging**
Scar camouflaging can be a game-changer for individuals with different types of scars, including surgical scars, trauma scars, and scars from burns or acne. However, the effectiveness of the procedure can depend on several factors like the age, size, and color of the scar, skin type, and overall health of the individual.
**3. The Process of Scar Camouflaging**
Scar camouflaging involves an initial consultation, during which a trained professional assesses the scar and skin tone to determine the appropriate pigment shades. They may perform a patch test to ensure that the chosen colors blend effectively. The actual procedure may require multiple sessions, with each session lasting between 1 to 2 hours.
**4. Healing and Aftercare**
Healing is a critical part of the scar-camouflaging process. The treated area may appear slightly darker initially but will gradually lighten to blend with the surrounding skin. Aftercare generally involves keeping the area clean, moisturized, and protected from sun exposure.
**5. The Potential of Scar Camouflaging**
While scar camouflaging does not entirely remove the scar, it dramatically reduces its visibility, helping individuals regain confidence in their appearance. It's worth noting that results can vary based on individual circumstances, and in some cases, scars may still be slightly visible after treatment.
**6. The Importance of Professional Expertise**
Scar camouflaging requires a deep understanding of color theory, skin types, and healing processes. As such, it's critical to choose a certified professional who specializes in medical tattooing. They should be able to provide a portfolio of their work and positive client testimonials.
In conclusion, scar camouflaging can offer a fresh start for those who have scars that affect their confidence or daily life. It's a testament to how far we've come in the realm of cosmetic procedures, providing an effective solution for skin imperfections that were once considered permanent.
Disclaimer: This blog post should not replace professional advice. Always consult with a healthcare professional before undergoing any cosmetic procedures.
Correcting Course: How to Fix Botched Permanent Makeup Brows
In the realm of beauty and aesthetics, permanent makeup has revolutionized the way we approach our daily routines. Permanent eyebrow makeup, in particular, offers the promise of perfectly shaped, worry-free brows all day, every day. But what happens when things don't go as planned, and you end up with botched brows? In this blog post, we'll guide you through the steps you can take to fix a botched permanent makeup job on your eyebrows.
**1. Don't Panic**
First things first: take a deep breath and remember that there are solutions available. It's important to note that freshly applied permanent makeup often appears darker and more intense than it will after it has healed. Wait for at least two weeks to allow the color to settle and fade a bit before deciding whether the job is truly botched.
**2. Consult with a Certified Professional**
Once you've allowed time for healing and are still unhappy with your brows, consult with a certified professional. A second opinion from a different permanent makeup artist can help you understand what went wrong and what steps can be taken to correct it. They will evaluate the shape, color, and technique used and provide you with the best options for correction.
**3. Consider Tattoo Removal Options**
In some cases, professional tattoo removal might be recommended. The two most common methods for eyebrow tattoo removal are laser treatment and saline removal. Laser treatment works by breaking down the pigment so that your body can naturally eliminate it. Saline removal, on the other hand, uses a saline solution to lift the pigment out of the skin. Both methods require multiple sessions and should only be performed by certified professionals.
**4. Opt for a Corrective Procedure**
Depending on the severity and nature of the botched job, your professional may suggest a corrective procedure. This can involve tattooing over the previous job to balance the color or reshape the brows. It may take more than one session, and the success largely depends on the skill of the professional, so ensure you choose an experienced artist.
**5. Maintain Proper Aftercare**
Regardless of the correction method you choose, proper aftercare is critical. Your professional will provide detailed instructions, but generally, you should keep the area clean, avoid direct sun exposure, refrain from picking or scratching the area, and keep it moisturized with a product recommended by your professional.
Remember, correcting botched permanent makeup brows is not a DIY job and should only be performed by trained and certified professionals. It's always worth taking the time to research and consult with an experienced professional who can guide you through the process and help restore your brows to their best possible shape and color.
Disclaimer: This blog post should not replace professional advice. Always consult with a professional before making any decisions about correction procedures for permanent makeup.
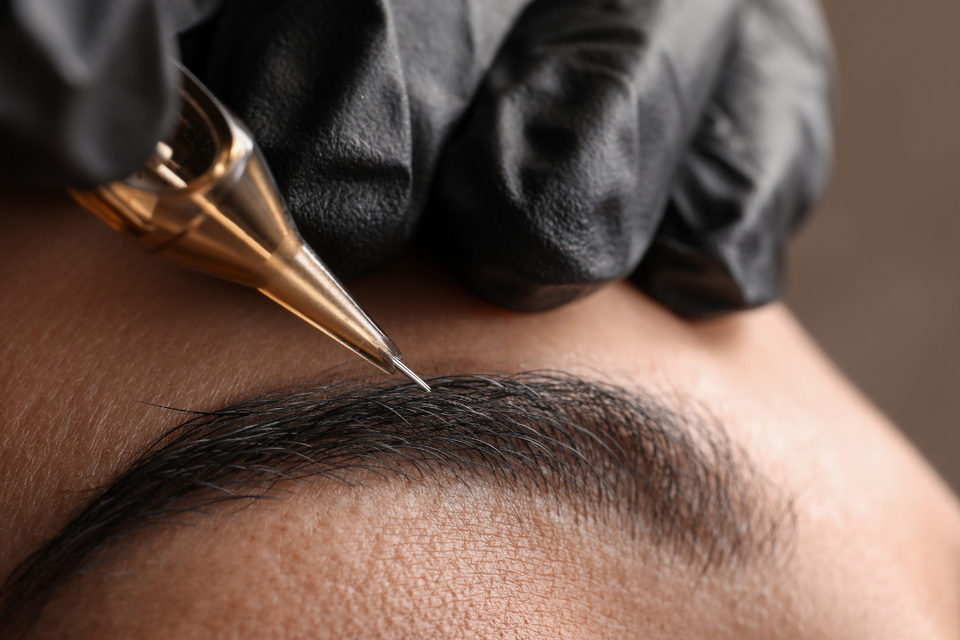
Ten Things You Need to Know About Scalp Micropigmentation
Title: Ten Things You Need to Know About Scalp Micropigmentation
Scalp micropigmentation (SMP) has emerged as a popular solution for hair loss, promising to create the illusion of a fuller, denser head of hair. If you're considering this procedure, there are a few key things you should know. Here, we'll outline the ten most important things to understand about scalp micropigmentation.
**1. What is Scalp Micropigmentation?**
Scalp Micropigmentation is a non-surgical treatment that uses detailed micro-needles to deposit pigment into the scalp. The result creates the appearance of tiny hair follicles that help thicken and restore the look of fuller hair.
**2. Who Can Benefit from SMP?**
Scalp micropigmentation is a versatile treatment that can benefit men and women experiencing all types of hair loss, including alopecia, genetic baldness, scarring from transplants or surgeries, and thinning hair.
**3. The Procedure is Semi-Permanent**
Unlike some hair restoration methods, SMP is a semi-permanent treatment. The pigments can last for several years, but touch-ups may be needed over time due to fading.
**4. Scalp Micropigmentation is Not Painful**
While pain tolerance varies from person to person, most people find SMP to be only mildly uncomfortable. Many clinics apply a topical numbing agent to the scalp before the procedure to minimize any discomfort.
**5. SMP Provides Immediate Results**
One of the biggest advantages of SMP is that it provides immediate results. Unlike hair transplants that take time to grow, you can see a significant difference in your appearance after just one SMP session.
**6. Scalp Micropigmentation Requires Skill and Precision**
SMP is a highly specialized procedure that requires a skilled and experienced practitioner. The practitioner must be able to create a natural-looking hairline and blend the pigments seamlessly with your existing hair.
**7. Aftercare is Essential**
Following your SMP treatment, it's crucial to follow aftercare instructions to ensure the best possible results. This includes keeping the scalp dry for a few days after each session and avoiding sunlight, swimming, and heavy exercise.
**8. SMP is Cost-Effective**
Compared to other hair restoration treatments like hair transplants, SMP is relatively affordable. The exact cost depends on the extent of the area to be treated, but it is generally a one-time investment with long-lasting results.
**9. Scalp Micropigmentation Can Enhance Hair Transplant Results**
For those who have had a hair transplant but are still seeking denser coverage, SMP can be used in conjunction with the transplant to provide additional density and cover any scars from the surgery.
**10. SMP is a Confidence Booster**
Hair loss can significantly impact self-esteem. SMP offers an effective solution to restore the appearance of a full head of hair, which can dramatically enhance confidence.
Scalp Micropigmentation is an innovative solution for anyone experiencing hair loss and seeking a non-invasive, affordable, and effective treatment. By understanding these key aspects of SMP, you can make an informed decision about whether it's the right option for you.
Disclaimer: This blog post should not replace professional advice. Always consult with a healthcare professional before undergoing any cosmetic procedures.
3 Essential Steps to Prepare for Your Permanent Makeup Eyeliner/Lash Enhancement
Permanent Makeup Eyeliner or Lash Enhancement is a fantastic solution for those seeking to accentuate their eyes without the daily effort of applying makeup. However, as with any cosmetic procedure, preparation is key to achieving the best results. Here are three essential steps to help you prepare for your upcoming session:
**1. Do Your Research**
The first step in preparing for permanent makeup eyeliner or lash enhancement is doing your research. Understand the procedure, its benefits, potential risks, and the healing process. Take the time to browse before-and-after photos to have realistic expectations of the results.
Don't hesitate to reach out to the professionals for a consultation. At My Beautiful Brows by Vee, we're always ready to answer your questions and provide the necessary information to make you feel at ease about your decision.
**2. Find the Right Artist**
Not all permanent makeup artists are created equal. It's crucial to find a professional with the right skills, experience, and artistic flair to meet your expectations. Look at their portfolio, read reviews, and ensure they're certified and follow strict hygiene practices.
At My Beautiful Brows by Vee, our team comprises experienced artists who prioritize safety and customer satisfaction, ensuring you're in capable hands.
**3. Pre-Procedure Care**
Proper pre-procedure care can significantly impact the success of your permanent makeup eyeliner or lash enhancement. Here are a few recommendations:
- Avoid alcohol, caffeine, and blood-thinning medications 24 hours before your appointment. They can cause excess bleeding, which may affect the absorption of pigment. - Stay hydrated and maintain a healthy lifestyle. Healthy skin responds better to the treatment. - Don't wear contact lenses to your appointment, and ensure you're makeup-free around the eye area.
Remember to discuss any allergies or skin conditions with your artist beforehand to avoid complications.
Permanent makeup eyeliner or lash enhancement can be a transformative experience, elevating your natural beauty and simplifying your daily routine. By following these steps, you're on your way to a successful, stress-free procedure, and waking up each day with perfectly enhanced eyes.
The Allure of Beauty Marks and Freckles: Embracing Individuality
In the fascinating world of beauty, trends come and go, but some characteristics remain timeless, captivating our admiration. Among them are beauty marks and freckles. These natural imperfections have become increasingly desirable, representing unique charm and individuality.
**A Mark of Distinction**
Beauty marks, also known as moles, have been perceived as signs of charm and elegance throughout history. Celebrities like Marilyn Monroe and Cindy Crawford sported these distinguishing features, turning what was once considered an imperfection into a symbol of glamour and beauty.
**The Charm of Freckles**
Like beauty marks, freckles are distinct features that many individuals find charming. Often associated with youthfulness and a sun-kissed look, freckles add a touch of individuality and character to the face. Many iconic figures, such as Emma Watson and Meghan Markle, have embraced their freckles, influencing others to appreciate these natural spots.
**The Rise of Faux Freckles and Beauty Marks**
In an era where self-expression and individuality reign supreme, the desire to replicate these natural characteristics through permanent makeup has increased. Cosmetic techniques such as faux freckle tattooing and the creation of beauty marks allow individuals to adorn their skin with these distinctive features, even if nature didn't grant them naturally.
**Why are They Desirable?**
1. **Individuality:** Beauty marks and freckles are unique to each individual. Having them adds a layer of distinction to your look, enhancing your individuality.
2. **Youthful Appeal:** Freckles are often associated with youth and vitality. They give off a fresh, youthful vibe that many find appealing.
3. **Natural Look:** In the era of no-makeup makeup trends, beauty marks and freckles add dimension and character to the face without the need for heavy makeup.
4. **Iconic Status:** Many famous personalities sport these features, contributing to their allure. Their iconic status in popular culture has helped shift the perception of beauty marks and freckles from imperfections to desirable features.
5. **Self-Expression:** For those who don't naturally have them, the ability to add beauty marks or freckles through permanent makeup is a form of self-expression. It allows individuals to enhance their features in a way that feels authentic to them.
The allure of beauty marks and freckles lies in their capacity to enhance natural beauty and promote individuality. As we continue to embrace and celebrate unique beauty trends, it's clear that these distinctive features are more than just a passing trend; they're a celebration of personal charm and self-expression.
Timely Tips for Finding the Best Place for Semi-Permanent Eyebrows
In today's fast-paced world, semi-permanent eyebrows have risen as a popular beauty trend, offering a convenient solution for those seeking defined, hassle-free brows. However, as with any cosmetic procedure, it's vital to find a reputable professional to guarantee the best results. This blog post will provide timely tips to help you find the best place for semi-permanent eyebrows.
**1. Start with Research**
The journey to finding the right place for semi-permanent eyebrows begins with diligent research. Start by searching online for salons and clinics in your local area that offer the service. Read through their websites to get a feel for their services and check if they specialize in semi-permanent eyebrows.
**2. Review Credentials**
Once you have a list of potential places, delve into the practitioners' credentials. Look for certified technicians with proper training in semi-permanent makeup. Certification ensures the technician has been trained in safety and hygiene protocols, which are crucial to avoid infections or complications.
**3. Check Out Reviews and Testimonials**
Customer reviews and testimonials can provide valuable insights into the experience and results you can expect. Look for reviews on independent platforms, such as Google reviews, for unbiased opinions. Remember, a few negative reviews are not necessarily a red flag, especially if the overall feedback is positive. However, repeated complaints about the same issue could indicate a problem.
**4. Evaluate Their Portfolio**
An artist's portfolio is a testament to their work. Look at before-and-after photos of clients who have gotten semi-permanent eyebrows. Evaluate the symmetry, color, and natural appearance of the brows. The best artists can create brows that seamlessly blend with the client's natural features.
**5. Book a Consultation**
Most reputable places for semi-permanent eyebrows offer consultations before booking a session. This meeting gives you a chance to meet the technician, ask questions, discuss your expectations, and assess the cleanliness of the facility. It also provides an opportunity to talk about color choices, brow shapes, and any concerns you may have.
**6. Consider the Price**
While it can be tempting to opt for the cheapest option, remember that you're investing in your face's appearance. Be wary of prices that seem too good to be true; they often are. High-quality work comes at a cost, and it’s better to pay a bit more for a reputable technician.
Finding the right place for your semi-permanent eyebrows is a significant step in achieving your desired results. By conducting thorough research, verifying credentials, reading reviews, examining portfolios, booking a consultation, and considering the price, you can ensure you’re in the best hands possible.
Remember, semi-permanent makeup is a form of cosmetic tattooing that should only be done by a certified professional. Safety should always be your top priority.
Disclaimer: This blog post should not replace professional advice. Always consult with a healthcare professional before undergoing any cosmetic procedures.